Installing an ice maker kit can be a relatively straightforward process if you have some basic plumbing and electrical skills. Here’s a general guide on how to properly install an ice maker kit. Please note that the specific instructions may vary depending on the brand and model of the ice maker kit you’re using, so always refer to the manufacturer’s instructions provided with the kit.
Materials and Tools You’ll Need:
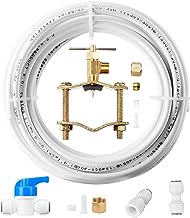
- Ice maker kit (includes ice maker unit, water supply line, and necessary hardware)
- Adjustable wrench
- Screwdriver (Phillips and flathead)
- Drill and drill bits (if required)
- Pipe cutter or tubing cutter
- Pliers
- Teflon tape (plumber’s tape)
- Level
- Power drill (if anchoring the ice maker)
- Safety goggles
Installation Steps:
- Turn Off the Water Supply:
- Locate the nearest water supply valve to your refrigerator and turn it off. Ensure there is no water flowing to the refrigerator.
- Prepare the Area:
- Make sure the refrigerator is unplugged from the electrical outlet.
- Clear the area around the back of the refrigerator to provide easy access.
- Mount the Ice Maker Unit:
- Consult the kit’s instructions for the specific mounting requirements.
- Typically, you’ll need to attach the ice maker unit to the back or side of the refrigerator using screws and a drill. Use a level to ensure it’s installed evenly.
- Connect the Water Supply Line:
- If your refrigerator has a water inlet valve near the bottom or back, connect the water supply line from the ice maker kit to this valve. Use an adjustable wrench to tighten the connections.
- If there’s no existing water valve, you may need to drill a hole through the wall behind the refrigerator and connect the water supply line to a nearby cold water pipe using a saddle valve or a tee fitting.
- Install the Drain Line (if applicable):
- Some ice maker kits come with a drain line. If yours does, follow the manufacturer’s instructions to install it properly, usually connecting it to a nearby drain or sink.
- Check for Leaks:
- Turn on the water supply valve and check for any leaks around the connections. If you notice any leaks, turn off the water supply and tighten the connections.
- Electrical Connections:
- Plug the ice maker unit into the designated outlet or follow the electrical wiring instructions in the kit if it’s not plug-and-play.
- Initial Setup and Testing:
- Follow the ice maker kit’s instructions to set the desired ice cube size and initiate a test cycle. This helps flush out any air in the water line and ensures proper operation.
- Final Adjustments:
- Make sure the ice maker unit is level both horizontally and vertically. Adjust as needed.
- Allow Time for Ice Production:
- It may take several hours for the ice maker to start producing ice. Be patient, and check periodically.
- Regular Maintenance:
- Keep the area around the coils and fan of your refrigerator clean to ensure efficient operation.
- Enjoy Your Ice: Once the ice maker is producing ice, you can start enjoying your ice supply!
Always consult the specific instructions provided with your ice maker kit, as there may be variations in the installation process based on the manufacturer’s recommendations. If you’re unsure about any step or encounter difficulties, it’s a good idea to consult a professional plumber or appliance technician for assistance.